
How I Used Swift to Build a Map Based Location Tracker for iOS
Anything location based is really cool, and having that information displayed on a map is even better! So … lets track our location and plot it on a map :)
The good news about this tutorial is there is very little code! The flip side is, we will have to do some extra setup. Lets begin!
Preface: I’m still very much a beginner to Swift, and I am just sharing my journey to help out other beginners :) I’m also using Xcode beta 5 for this.
Setup
Setting up the project
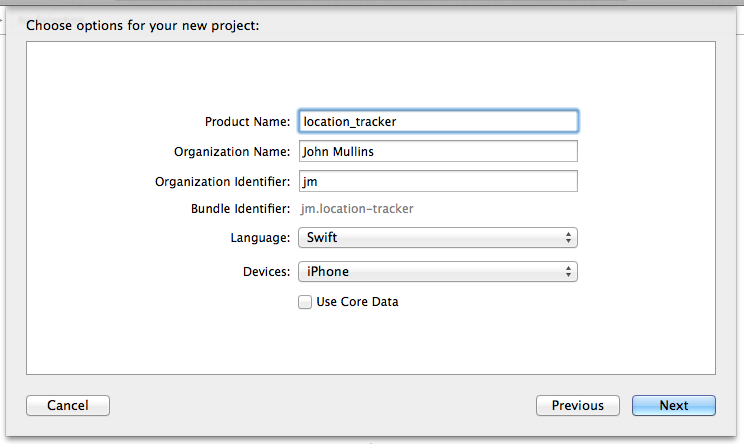
File -> New -> Project
Then select
iOS -> Application -> Single View Application
Give it a name and make sure we are using the language Swift :)
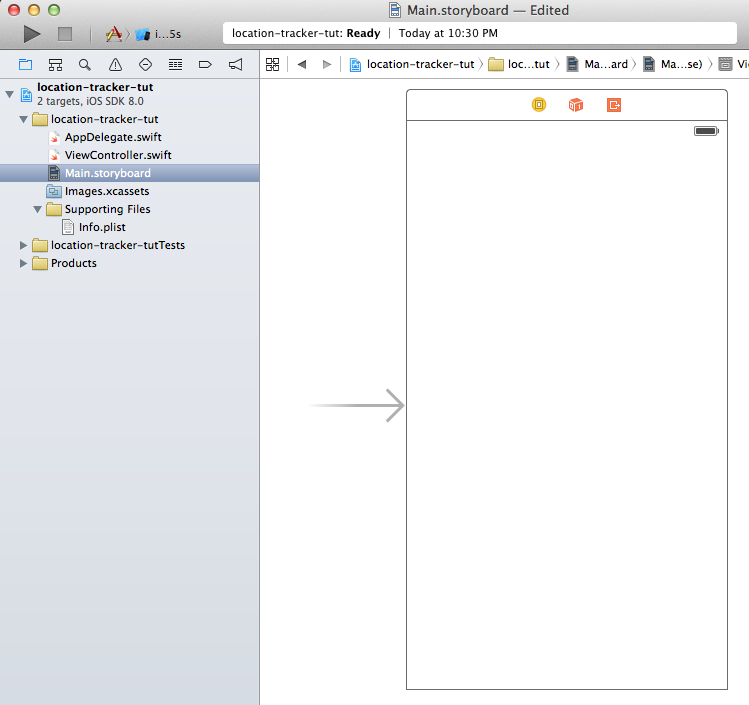
Open our Main.storyboard file.
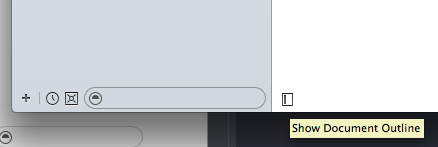
Show the document outline. There is a little handle in the lower left window of the storyboard to do this.
Highlight our View Controller for this scene, and navigate to the attributes inspector.

For this project, we are going to set the size to be “Retina 4-Inch Full Screen” and I’m going to set the Orientation to Portrait.
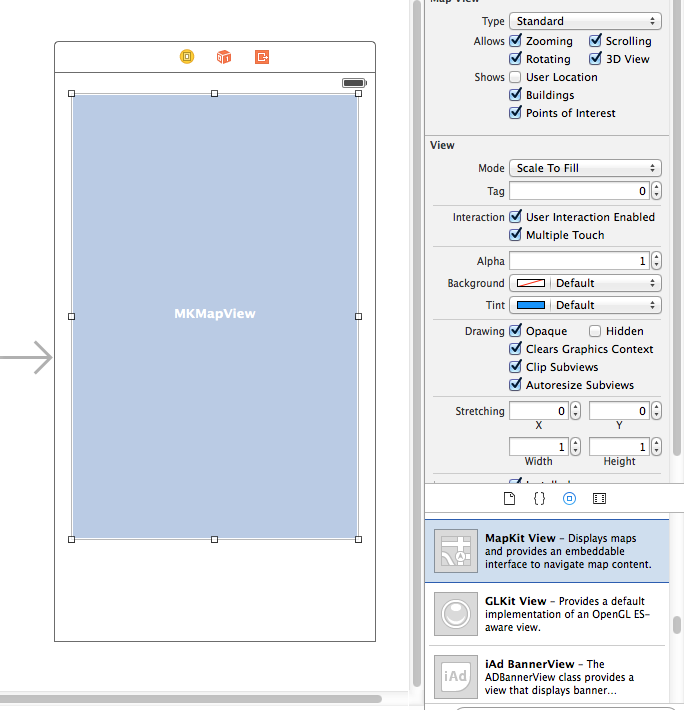
Setting up the MapKit View
Apple has already provided us with a map view. So we just need to drag one into our scene.
Setting up the label
We are also going to have a label to display some debug information about our location. Drag one into the scene as well.
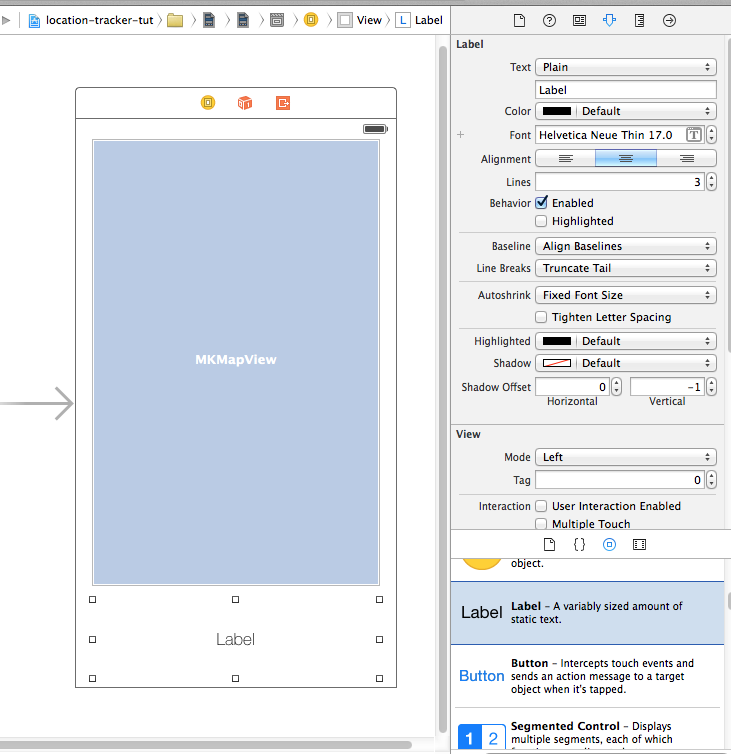
Feel free to adjust the attributes in the inspector to make the label look like mine. I centered the text, gave the label 3 lines, and used the awesomely cool font ‘Helvetica Neue Thin’ with a font size of 12 (incorrectly “17.0” in screen shot).
Creating the IBOutlets
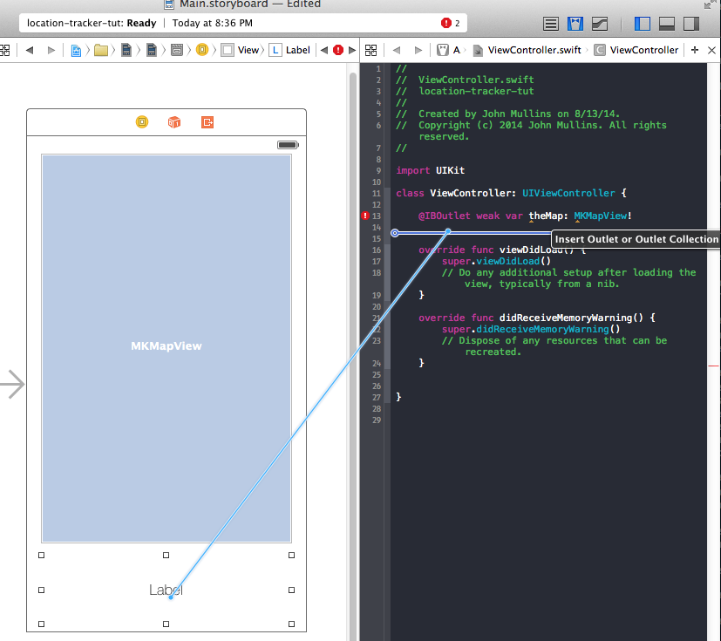
Now that we have our mapview and label, we are going to drag them into our ViewController.swift code so we can control them with code.
We want to switch to assistant editor (the view that looks like a suit and bow tie in the upper right), and then “right click drag” our MKMapView into our ViewController.swift file.
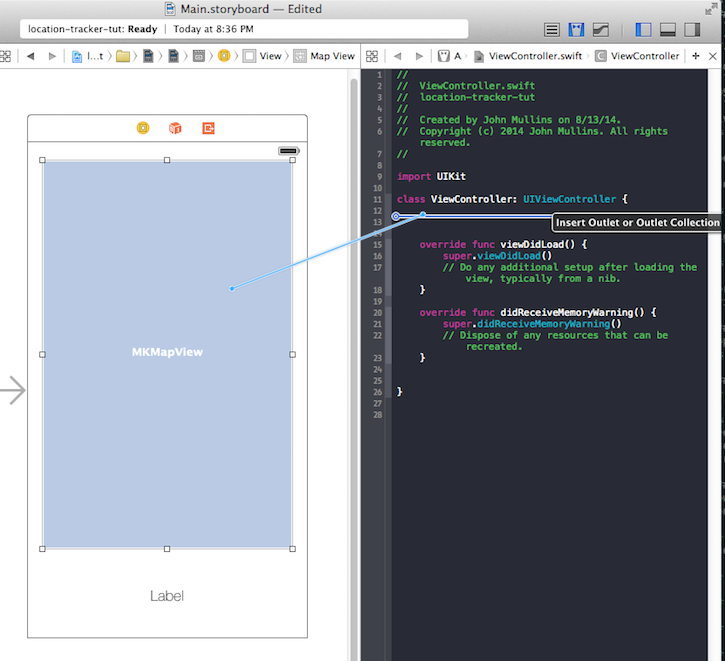
We also want to right click, and drag from the Label to our ViewController.swift file.
You will see some errors, but this will go away once we fix our imports. If you are dying to fix this now, add this under import UIKit
import CoreLocation
import MapKit
Editing the info.plist
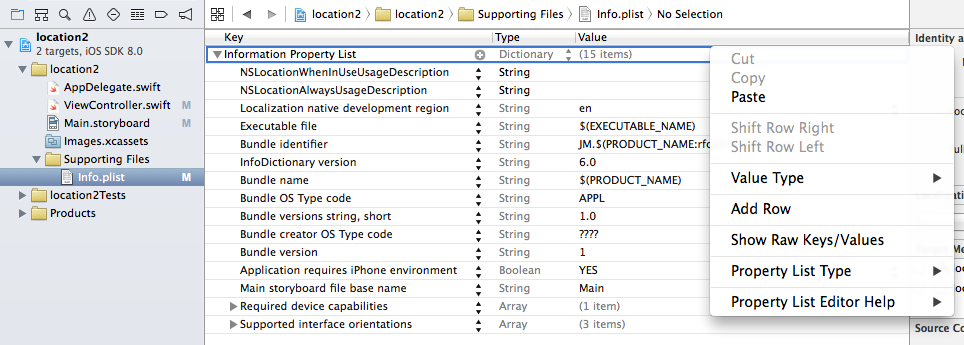
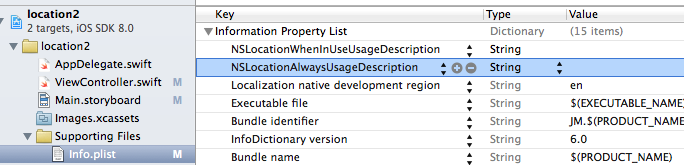
We need to add 2 keys to our info.plist file, which is located in the “Supporting Files” folder. The two keys are NSLocationWhenInUseUsageDescription and NSLocationAlwaysUsageDescription. Right click on “Information Property List”, click Add Row, and manually enter these two keys.
The final form should look like this:
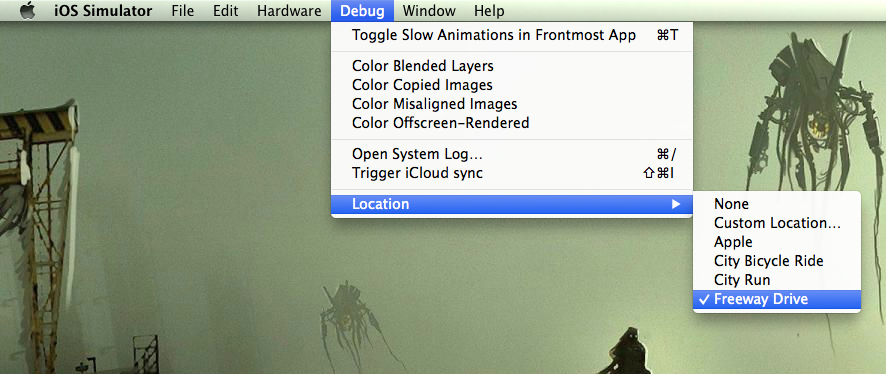
Simulating your location
The last thing I want to mention is there is no way (I saw) to have the iOS simulator aware of your actual location. However, the simulator DOES allow you to fake this data. Make sure you have a good simulation selected or else this program will just show an empty map.
Once you have the simulator going select a location!!!
ViewController.swift and Full Code
Phew! Thank goodness all that setup is out of the way. Time for the code!
Inheritance & Initial variables
class ViewController: UIViewController, CLLocationManagerDelegate, MKMapViewDelegate {CCLocationManagerDelegate and MKMapViewDelegate as classes we are inheriting from.
If you feel comfortable with the concept of inheritance, try holding the command key and clicking on MKMapViewDelegate or CCLocationManagerDelegate to get a list of methods that we can use.
If you are not comfortable, its not that important for this tutorial.
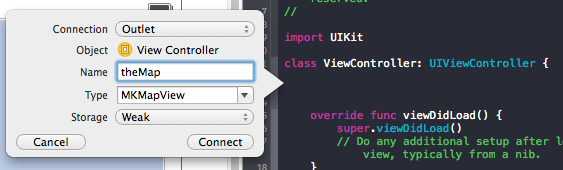
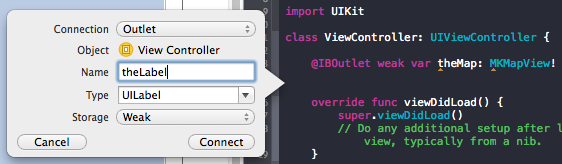
    @IBOutlet weak var theMap: MKMapView!
    @IBOutlet weak var theLabel: UILabel!

    var manager:CLLocationManager!
var myLocations: [CLLocation] = []We create a manager of type CLLocationManger and since we are not giving it an initial value, we make it an optional with the ! mark.
Per Apple’s definition: “Optionals say either “there is a value, and it equals x” or “there isn’t a value at all”. Optionals are similar to using nil with pointers in Objective-C, but they work for any type, not just classes. Optionals are safer and more expressive than nil pointers in Objective-C and are at the heart of many of Swift’s most powerful features.”
We also set up an array of CLLocation’s and name that myLocations. This is where we are going to store every location we go to. I initialize it as an empty array, so no need for an optional here :)
viewDidLoad
For the sake of this app, this functions acts as our entry point to the entire program. Technically, this function is called when the view is done loading.
    override func viewDidLoad() {
        super.viewDidLoad()

        //Setup our Location Manager
        manager = CLLocationManager()
        manager.delegate = self
        manager.desiredAccuracy = kCLLocationAccuracyBest
        manager.requestAlwaysAuthorization()
manager.startUpdatingLocation()CLLocationManager. Basically, this guy is responsible for knowing where we are at all times … physically. We use a delegate so we can take advantage of a function that gets called every time our location is updated:locationManager(manager:CLLocationManager, didUpdateLocations locations:[AnyObject])
There are various desiredAccuracy’s we can use, but we want this accurate to within 5 meters, so we are using kCLLocationAccuracyBest.
When we call manager.requestAlwaysAuthorization you will get a little popup on your iOS device that will ask for permission so that the app will know our location. I encourage you to say yes to this ;)
Finally, we call manager.startUpdatingLocation() which actually starts checking if we change locations or not. If we change locations, it will call:
locationManager(manager:CLLocationManager, didUpdateLocations locations:[AnyObject])
        //Setup our Map View
        theMap.delegate = self
        theMap.mapType = MKMapType.Satellite
        theMap.showsUserLocation = true
}MapKitView here. We are delegating ourself so we can later specify how to render our overlays. Overlays are anything that sits on top of the map. In our case, the lines we draw will be overlays.
Our map type is Satellite but you can also choose MKMapType.Standard and MKMapType.Hybrid much like you would the Maps app on our iPhones.
The variable showsUserLocation will add the blinking blue dot to our map to show where we currently are.
locationManager didUpdateLocation
As one might guess, this function gets called every time our location changes.
func locationManager(manager:CLLocationManager, didUpdateLocations locations:[AnyObject]) {
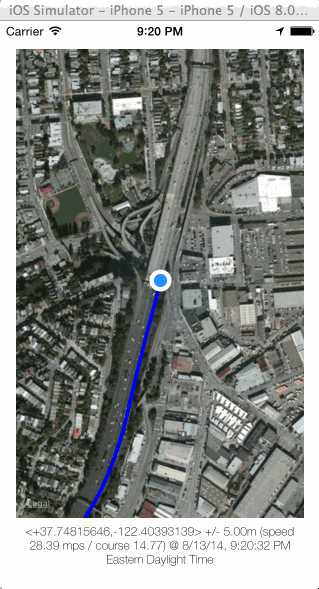
theLabel.text = "\(locations[0])"
myLocations.append(locations[0] as CLLocation)The first thing we do is update theLabel’s text with the details about our location. This will show all the interesting details at the bottom of our app including our longitude, latitude, how fast we are moving, and details about what time it is.
Notice how locations is an array of CLLocation’s. In my experimentations, it seems like this array always only has 1 value. This is why I’m accessing the 0th (first) index of the array. I imagine this might have multiple values if we are tracking more than one object. If anyone would like to enlighten me, that would be great :)
We add this location to the array we created for holding all of our locations named myLocations.
        let spanX = 0.007
        let spanY = 0.007
        var newRegion = MKCoordinateRegion(center: theMap.userLocation.coordinate, span: MKCoordinateSpanMake(spanX, spanY))
theMap.setRegion(newRegion, animated: true)theMap.userLocation.coordinate. The span refers to how zoomed in we actually are in the region. Feel free to play around with these numbers. They felt right to me, shaken.. not stirred.
        if (myLocations.count > 1){
            var sourceIndex = myLocations.count - 1
var destinationIndex = myLocations.count - 2myLocations. I set up the index’s to use to make the code easier to read.
            let c1 = myLocations[sourceIndex].coordinate
            let c2 = myLocations[destinationIndex].coordinate
var a = [c1, c2]coordinate method for CLLocation returns a CLLocationCoordinate2D. With this we can create a line between the two points. We are creating an array out of the points we want to draw lines between with my poorly named variable a.
            var polyline = MKPolyline(coordinates: &a, count: a.count)
            theMap.addOverlay(polyline)
        }
    }
MKPolyline has some interesting syntax, but it basically needs a pointer to an array of CLLocationCoordinate2D’s which happens to be our array a. So I pass a reference to this pointer with the & symbol. Pointers and references are a big topic that I will not be digging into with this tutorial, but I encourage you to do some research on this topic.
Finally, we add our polyline to the theMap as an overlay.
We are not quite done yet, even tho we added the line to the map, the map has no idea how to actually draw it. We have to specify a renderer for it, which we will talk about next.
mapView rendererForOverlay
We are inheriting this method from our MKMapView delegation. This method will be called whenever the MKMapKitView has to render an overlay.
    func mapView(mapView: MKMapView!, rendererForOverlay overlay: MKOverlay!) -> MKOverlayRenderer! {

if overlay is MKPolyline {MKPolyline. If you are rendering things that are not polyline’s we use a different type of renderer.
var polylineRenderer = MKPolylineRenderer(overlay: overlay)MKPolylineRenderer and passing out overlay to it. In our case, it is the polyline we created in the didUpdateLocation. There are different renderers for different things.
            polylineRenderer.strokeColor = UIColor.blueColor()
            polylineRenderer.lineWidth = 4
            return polylineRenderer
        }
        return nil
}polylineRender. In our case, if the overlay is not a MKPolyline we are returning nil.
Conclusion
Well, that was a lot of fun and I’m really happy with the results. I was watching that little car drive around the whole time I was writing this tutorial. I don’t know what sorta freeways let you go 30 mph, but whatever ;)
We can do a lot with this framework. One thing I was doing by accident at first was using Apple’s MKDirections API to ask for directions between the two locations to draw a line before I realized I didn’t have to do that at all. I actually had the code mostly working, but maybe I will save that for a tutorial some other day.
Anyhoo, hope this is useful and I hope you all enjoy learning Swift as much as I am :)